
Bathroom Tile Replacement Geelong
Every tile replacement we carry out begins well before a single tile is lifted. We assess the full scope of the work — floor, walls, shower surround, or all three — and we take the time to understand what has been happening beneath the existing surface. Water damage, soft substrates, and deteriorated waterproofing are common findings in older Geelong bathrooms, and identifying them early means we can address the cause rather than simply cover it up. We help you choose from porcelain, ceramic, natural stone, subway, mosaic, and large-format tiles, and we will give you honest advice about which materials suit wet areas best over the long term. Once the tile selection, layout pattern, and grout colour are settled, we calculate quantities carefully and order enough material to account for cuts and any unexpected breakage along the way.
Demolition is more involved than most people expect, and we approach it methodically to protect everything that needs to stay intact. We remove existing tiles using chisels, oscillating tools, and pry bars, working section by section to minimise damage to the substrate underneath. Fixtures and fittings that could be damaged during the process are removed beforehand, and we take care around plumbing penetrations and any electrical work in the vicinity. Once the old tiles and adhesive are cleared away, we inspect the substrate thoroughly. A subfloor that flexes, a wall sheet that has absorbed moisture, or a shower recess that was never properly waterproofed will cause new tiles to crack, lift, or leak regardless of how well they are laid — so this stage of the job is where we make sure the foundation is genuinely sound before we move forward.
Enquire Now!Where the substrate needs attention, we repair or replace it properly rather than tiling over the problem. On floors, we address any soft or damaged sections of the subfloor and apply levelling compound where the surface is out of tolerance, because even minor movement or unevenness will telegraph through to the tiles above over time. On walls and in shower recesses, we install cement sheet or an appropriate moisture-resistant backing, tape and set all seams, and then apply a full waterproofing membrane to every wet area. Corners, junctions, and penetrations all receive specific attention because those are the points where water most commonly finds a way through. Correct falls to the drain are formed at this stage too, and we take them seriously — a shower floor that does not drain efficiently is one of the most common complaints we see in bathrooms that were renovated without enough care being taken at the preparation stage.
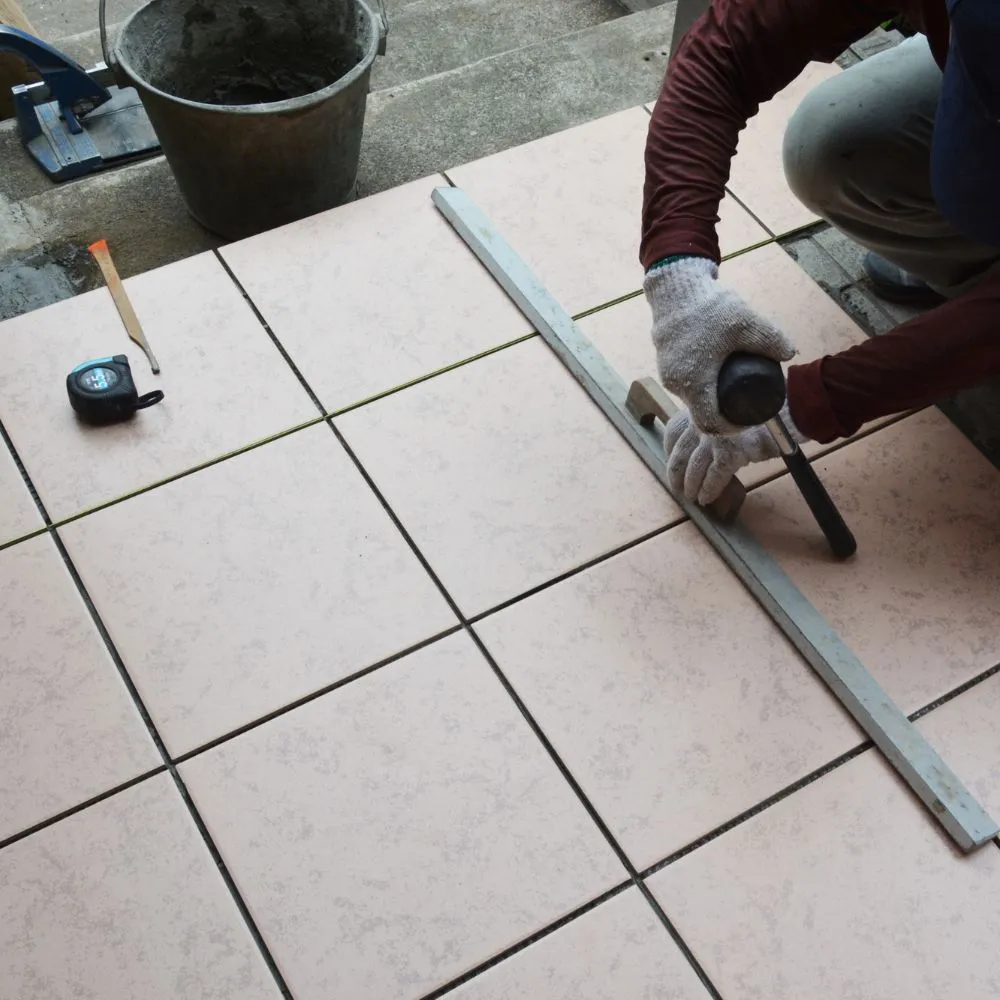
With the substrate sound and waterproofed, we move into laying the tile. We establish accurate reference lines across the floor and up the walls, dry-lay tiles to confirm how the pattern will fall and where cuts will sit at the edges, and only then begin setting in thinset mortar. The trowel notch size, mortar type, and back-buttering method are all matched to the specific tile being used — large-format porcelain, for example, needs a different approach to a small mosaic sheet. We use levelling systems to keep lippage consistent across the field, check for plumb and level constantly as the work progresses, and cut tiles cleanly on a wet saw with smooth finished edges at every junction. Thinset is allowed to cure fully before we grout, because moving to the next stage too early is a shortcut that compromises the finished result.
Grouting and finishing bring the whole job together, and the details here matter as much as anything that came before. We select the appropriate grout type for the joint width and the location — epoxy grout in a heavy-use shower, for instance, offers durability and stain resistance that standard grout simply cannot match. Grout is worked diagonally across the joints with a rubber float, packed consistently, and cleaned back carefully before it has a chance to haze on the tile face. At all internal corners and junctions where two planes of tile meet, we use silicone caulk in place of grout, because those are movement points that rigid grout will crack through over time. Once everything has cured, the surface is cleaned down, any remaining haze is buffed off, and the bathroom is ready to be put back into use. The result, as we see it across bathrooms throughout Geelong, is a surface that stays sound and looks sharp for decades when the underlying work has been done properly from the start.
Enquire Now!
FAQ
How long does a tile replacement typically take from demolition to finished job?
For a standard bathroom floor and walls, most tile replacements we carry out take between three and five days from demolition through to grouting and final cleanup. A shower recess on its own can be completed more quickly, while a full bathroom including floor, all walls, and a shower surround will sit toward the longer end of that range. The biggest variable is what we find once the old tiles come off — if the substrate needs significant repair or the waterproofing has to be fully redone, we factor that in before we start laying anything new.
Do I need to move out of my home while the tile replacement is happening?
Most homeowners in Geelong stay in their home throughout the job. The bathroom will be out of use during the work, so if you have a second bathroom that is practical without too much disruption. If you have only one bathroom, it is worth talking to us early so we can plan the schedule to limit the time you are completely without access. We aim to have the space functional again as quickly as the curing times for the mortar and waterproofing membrane will allow.
What happens if water damage or rot is found once the old tiles are removed?
It is not unusual, particularly in older Geelong homes, to find moisture damage to the wall sheeting or subfloor once the existing tiles come off. When that happens we stop, show you exactly what we have found, and explain what needs to be done before tiling can proceed. We do not tile over a compromised substrate — doing so would mean the new tiles fail in the same way the old ones eventually did. Any additional substrate work is scoped and agreed with you before we proceed.
Is the waterproofing included in a tile replacement or is that a separate cost?
Where the existing waterproofing is intact and in sound condition, a full redo may not be necessary. However in a shower recess, any area where we are removing tiles and exposing the substrate is re-waterproofed as part of the job — this is not something we treat as optional. Corners, penetrations, and junctions all receive proper membrane treatment. We would rather be straightforward about that requirement upfront than have a customer dealing with a leak behind brand new tiles a year down the track.
Can you match existing tiles if I only want to replace a section rather than the whole bathroom?
Partial tile replacement is something we can certainly carry out, but matching existing tiles is genuinely difficult. Even if the same tile is still in production, colour variation between batches means a perfect match is rarely achievable. Our honest advice is to bring a sample to the tile supplier before committing to a partial replacement, so you can assess the difference in person. In some cases homeowners decide a full replacement gives a better result than a visible patch, and we are happy to talk through both options with you.
What tile sizes and types work best for a Geelong bathroom floor versus the shower walls?
For bathroom floors, a porcelain tile with a matte or textured finish gives good slip resistance and handles the moisture cycle that comes with daily bathroom use. Large-format tiles, typically 600x600mm or bigger, are popular because they create fewer grout lines and give a clean, open feel — though they do require a very flat substrate to be laid properly. For shower walls, large-format porcelain or ceramic works well and is easy to keep clean, while natural stone adds character but needs sealing and a little more ongoing care. We are happy to work through the options with you based on your bathroom layout and how the space is used.
How soon after tiling is finished can we use the shower or bathroom?
The thinset mortar typically needs 24 to 48 hours to cure before grouting can begin, and the grout itself needs a further 48 to 72 hours before the area should be exposed to water. For a shower recess we generally advise waiting a full 72 hours after grouting is complete before running water through it. These timeframes are set by the products being used and are not ones we recommend shortening — the waterproofing membrane also has its own cure time that we observe before tiling begins over it.
Do you supply the tiles or do we need to source them ourselves?
Either arrangement works for us. Some homeowners prefer to visit a tile supplier themselves, choose what they like, and have the tiles on site when we arrive — and that is completely fine. Others prefer to have us involved in the selection process, particularly when it comes to checking that a chosen tile is suitable for its intended location and that the quantity ordered is correct. What we do ask is that tiles are confirmed and available before the job is scheduled, so we are not waiting on a delivery that pushes the timeline out.